
DIY: How to Make an Adjustable Yoga Mat Strap for Less Than $10
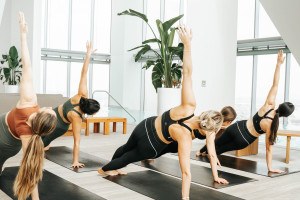
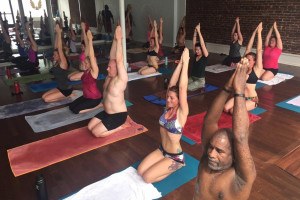
My husband’s birthday was two weeks ago, and since he and I have been getting into yoga lately, I thought a good-quality yoga mat—one that keeps you from slipping and sliding on sweaty palms—would make for great present. So after collecting some recommendations from a few yoga teachers and trying out a few mats myself, I opted to get him The Mat from Lululemon. And, well, to avoid being totally jealous every time we went to class together, I decided to splurge and get one for myself, too. Happy birthday to me.
Anyway, after shelling out all that cash for not one but two Lulu mats, I simply couldn’t justify spending another $20 each for a mat strap. Besides, I thought to myself, how annoying could carrying a yoga mat under your arm actually be?
Conclusion after two weeks of doing it: It’s very annoying. And since we ride our bikes to class most of the time, cramming them into our bags wasn’t working out all that well either.
But still. Another $40 on yoga gear? Really? And then I realized something: Why don’t I just make the straps myself?
My mom got me a sewing machine for my birthday a few years ago, and while I don’t bust it out all too often, I’ve managed to make several not-terrible gifts with it (you’re welcome for those neat reversible placemats, Mom!) and I can now successfully hem curtains and pants like a champ. So figuring that a map strap would require like, a handful of quick stitches, total, I decided to give it a whirl.
I can’t put a total dollar amount on the cost of the project, since we had some nylon webbing lying around the house from our former college rock climbing days. But since the rest of the supplies (all of which I got at A.C. Moore, by the way) cost about $6 for enough for two straps, I imagine you could easily make a strap for less than $10. And while you don’t have to have a sewing machine to do it, it certainly helps, since nylon straps are thick and getting a needle through them might prove difficult, if all you have behind you is sheer will.
Anyway, if you’re feeling crafty, here’s how to replicate my DIY adjustable yoga mat strap. The instructions and supplies are for one strap.
DIY: How to Make an Adjustable Yoga Mat Strap

Gather your supplies
What you’ll need:
• Five-foot length of nylon straps or webbing (You probably won’t use it all, but I’m of the opinion that I’d rather have some left over than not enough to begin with.)
• Heavy-duty thread
• Heavy-duty needle
• One strap adjustor
• Two D-rings
• Matches or a lighter
• Scissors
Method:
1. Cut your nylon strap if necessary and burn the freshly cut edge with a match or lighter so it melts together. Do this to avoid fraying.

Note, these—and all the other hairy arms you'll see in these pictures—are my husband's. I just wanted to clear that up off the bat.
2. Once it cools, fold the melted edge around the straight side of one of the D rings, with about an inch-and-a-half of overlap. Sew the folded piece to the strap about a quarter of an inch from the edge.
Doo dee doo … sewing, sewing.

Note: Those are my hands. Wow, I need a manicure.
3. Sew another line right along the edge of the D-ring to hold it in place, like this …

Eh, so it's not exactly straight. SUE ME.
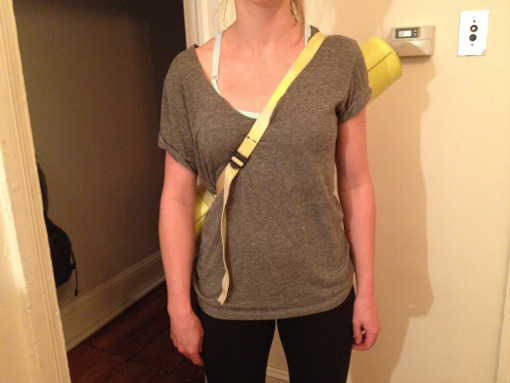
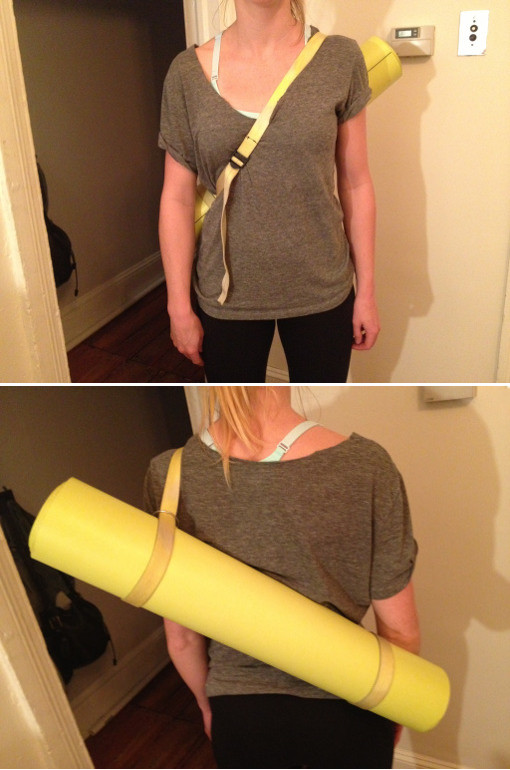
4. Thread the other end of the nylon strap through the D-ring to create a loop. This will go around one end of your yoga mat. With a buddy there to help you, hold the half-completed strap with the mat attached up to you to eye ball where you’d like the adjustor piece. There’s probably a more scientific way to do this, but, well, I’m no scientist.

Thiiiiiis feels pretty good.
*Note: We installed the adjustor piece because we ride our bikes to the studio and wanted a way to cinch the mats snug against our backs so they wouldn’t bounce. If you don’t need a super-snug fit, you could skip the adjustor piece altogether and simply sew a D-ring on to the other end using the method above and call it a day. But if you want the strap to be adjustable, read on.
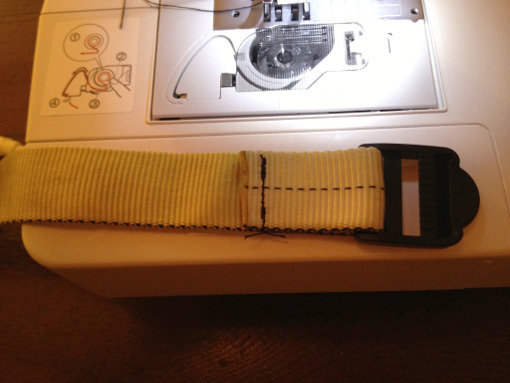
5. Once you mark where you want the adjustor piece to fall, cut the nylon strap at that mark and burn the edge to avoid fraying. Then, loop it through the non-cinching end of the adjustor piece, like this …

Make sure you read the instructions on the back of the adjustor piece’s packaging to ensure that you’re installing it right side up. Because there is a wrong side up. (We learned the hard way.)
6. Sew the adjustor piece in place.
7. On the remaining piece of nylon strapping, repeat steps 1 through 3. Then, thread the end through the D-ring to create a loop for the mat. Fit it around the mat so both ends of the almost-complete mat strap are around the mat. You’re almost done!
8. Hold the mat up against your back and loop the open end of the nylon strap through the adjustor piece. Cinch it to adjust it to your desired tightness. Cut any superfluous strapping that’s left, leaving yourself about 6 or 7 inches on the end, so you have enough length for adjusting. Melt any freshly-cut edges with a lighter.

9. Voila! You’re done! Enjoy carrying your mat like a pro. Or like a person who just DIY’d a mat strap.
