
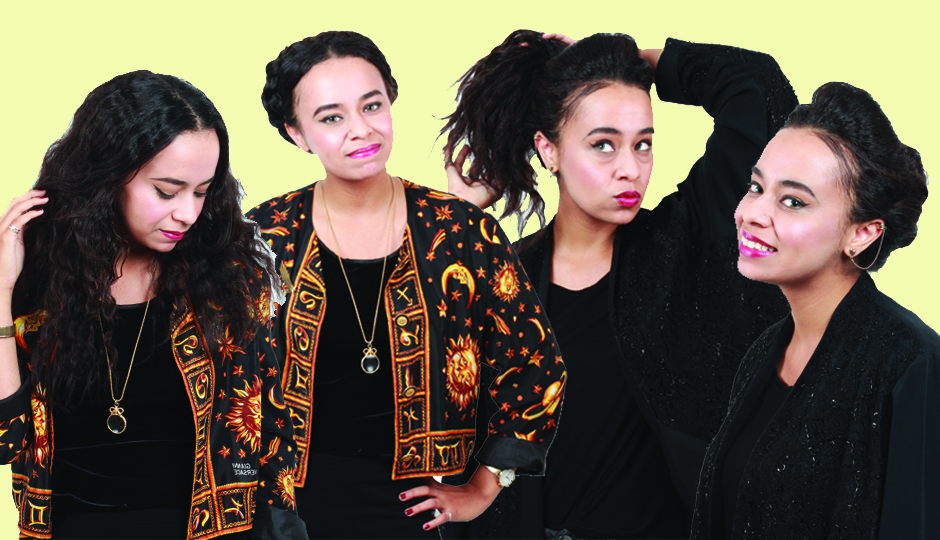
4 Quick and Easy Hair Styles for Women With Biracial Hair
Fun with hair! | Lauren McGrath.
I like to think my hair is a little bit like me: buoyant and sassy at its best, fickle and uncompromising at its worst.
I have been locked in a love-hate struggle with my hair with for years. It’s the product of my white mom’s stick-straight, coarse dark hair and my black father’s long, twisted locks, a combination that gives it a unique texture and shape that turns heads. But it took tremendous beauty store expenditures on “miracle products” and repeated trial and error (read: looking like a hot mess until I got it right) to eventually find a routine that wasn’t a Homeric battle of epic fro-portions.
With the right products, detangling strategy and night preparation, you’ll have a variety of styles to choose from in the morning. I have an arsenal of four go-to styles that I interchange depending on my mood, outfit and the weather. Not only are they super-easy, but you can switch between them as the day calls for it. Keep in mind that not all biracial hair is the same; these are just a few looks that work for my type 3B hair. You can use this helpful guide to ethnic hair to figure out if these styles are right for you.
Natural Waves
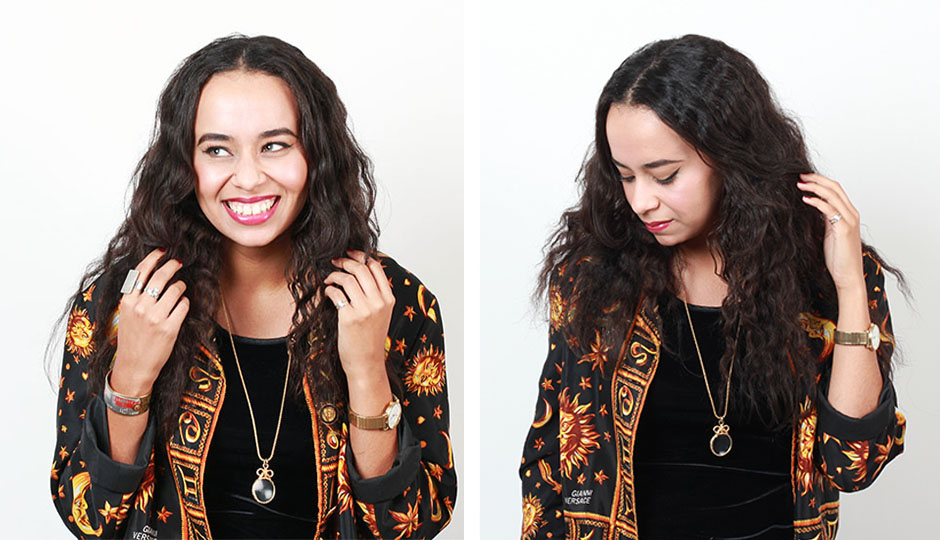
Long and flowing. | Lauren McGrath.
These silky smooth beach waves are best achieved through a one-to-two day advanced preparation. To start, I usually wash my hair once a week; it’s prone to dryness when it’s over-washed. Then, I detangle it using a wide-tooth comb and the divide-and-conquer method while it’s still in the conditioning phase. Recently I’ve come to love Shisedo Tsubaki Shining Conditioner ($15) – its moisturizing Tsubaki oil softens hair within 10 to 15 minutes – but you can use any conditioner that works for you.
Once you’re knot-free and have rinsed out the conditioner, towel-dry your hair (avoid heat from damaging hair dryers) and separate it into anywhere from two to six sections: More sections equals smaller waves. Braid each section of hair and secure with hair-ties. Before going to bed, use two to three sprays of a defrizzer, like Luster’s Pink Glossier ($4) or OGX Renewing Argan Oil of Morocco ($8), and then wrap your braids in place with a silk hair scarf or bonnet. Wake up in the morning, take out your braids using a finger-combing technique, headbang a little and, ta-dah! You’re ready to take on the world with your gorgeous waves. Just make sure to wear this style when it’s not humid or raining and bring along a travel-sized can of hold spray.
Milkmaid Braids

A crown of braids. | Lauren McGrath.
Pro-tip: If you’re biracial, you probably never want to leave the house with wet hair because your hair will be a tumbleweed in a matter of hours. This style is perfect for a rainy or humid day to keep frizz to a minimum, or if you’re just in the mood for a cute, no-frills up-do.
Start out by parting your hair down the middle and begin to braid each side from as tight and close behind the ears as possible. You can use a hair-tie or pin to keep one side braided while the other is being done. Finally, using about five to eight bobby pins, pull the braids tightly over the head like a crown and pin them in place. It should only take about five to 10 minutes and you can easily do it in public places, like the bathroom at work. If you have an event or special occasion to attend in the evening, transition into loose waves by simply taking the braids out and teasing them. Your waves will retain their shape with the magic of a little holding spray — Redken Pure Force Fixing Spray ($10) is affordable and gets the job done.
Bouffant Bun

Volume for days. | Lauren McGrath.
A feminine Edwardian coiffure with a rockabilly twist, this bouffant bun was inspired by Gibson Girl illustrations. It looks trickier to pull off than it really is and takes practice to perfect, but don’t get frustrated. You don’t need a bangs to do it, and I only used three bobby pins and a bit of fixing spray to keep everything in place.
Begin with the bouffant: Take your bangs or hair from the front of your head and backcomb it until it is sufficiently poufed up. Gently tuck the ends of the hair strands you just backcombed around your index and middle fingers and form a loop. Keep tucking that loop underneath itself with your fingers, as if you are putting an invisible roller in, and then secure your bouffant in place with bobby pins. Using a small eyebrow brush, smooth out the front and spread out the hair evenly so that your bouffant is seamless. Optional: For taming edges, use Cream of Nature Argan Oil Perfect Edges gel to slick down babyhairs. Then just gather your remaining hair and begin to twist it into a tight bun that sits on what I can best describe as a hair pile. You can leave some loose strands out near the ears for a softer look.
Retro Ponytail
This is the easiest style of the bunch. Follow the first part of the Bouffant Bun tutorial to achieve your bump. Then, instead of twisting your tresses into a bun, secure them in a high, free-flowing pony. For tighter curls, use a 1″ curling iron in the morning or leave in flexi-rods before bed.
